White light solar filters 1st results
Finally some useful results! This comparison is harder to do than I had naively assumed. I'm now aware that:
- Clear skies and an interesting sunspot group are just the beginning.
- Unless seeing conditions are very good, lots of images of each combination are required to get a good lucky image.
- Don't leave your camera in direct sunlight, heating of the camera by the sun and its electronics can make a significant difference.
My preliminary results are compromised because of problems caused by these issues, but are still useful. I plan to repeat this experiment including a Questar full aperture glass filter, when I have full use of my right arm and can use a location without suburban roof tops roiling the air. After adding the back end filters, the camera was quite hot after sitting in the sun a few minutes which increased noise in the images. Keeping the camera shaded next time should help significantly.
Test procedure
Image acquisition started 2016-11-29 at 19:00 UT and took about 40 minutes, not including about 15 minutes for setup. I used the 3.5" Questar standard telescope with low expansion cervit mirror and broadband coatings. The camera was a stock Sony alpha 6300 with 24 MP APS-C sensor. After a reference image, each white light filter is shown with two images and with and without the UV/IR cut and #58A green filter stack. This is the best "lucky" image of about 80 images taken with each filter combination. Images were taken at ISO 100 and ISO 400 with the extra back end filters. Exposure time was set 2/3 stops below saturation.
This image was deconvolved in Lynkeos and exposure stretched in Photoshop to show the detail present in a processed image. The order of the images taken was: Questar sub-ap, TO film, TO glass, Baader film, Baader film + cut filters, To glass + cut filters, and TO film + cut filters.
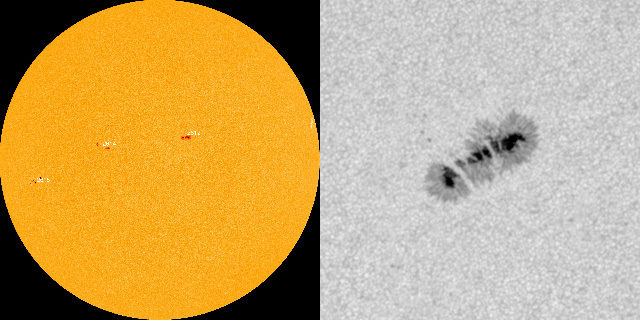
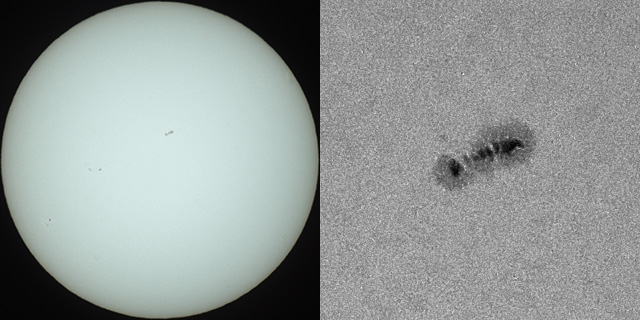
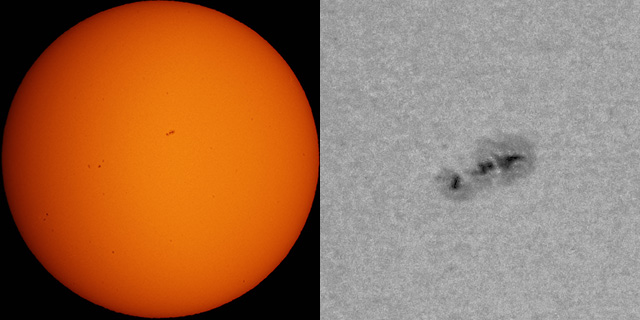
The full solar disk is shown reduced by 10 times to show the overall coloring of the image. A full scale crop of a large sunspot group is shown to show the resolution and detail of the image. The crop is monochrome to avoid the distraction of different color images
Preliminary results
Comparisons between filters are compromised because 80 images were not enough to get equivalent images for each filter combination. Better conditions and more images are needed to show each filter at its best.
The images with the IR/UV cut filter and #58A green filter are better than without them in every tested case. With a caveat to the seeing conditions, the Baader AstroSolar Film gave the best results with the Thousand Oaks Glass 2+ solar filter not far behind.
Reference image
Images taken from the Solar Dynamics Observatory HMI from the Space Weather site and the SDO archive site.
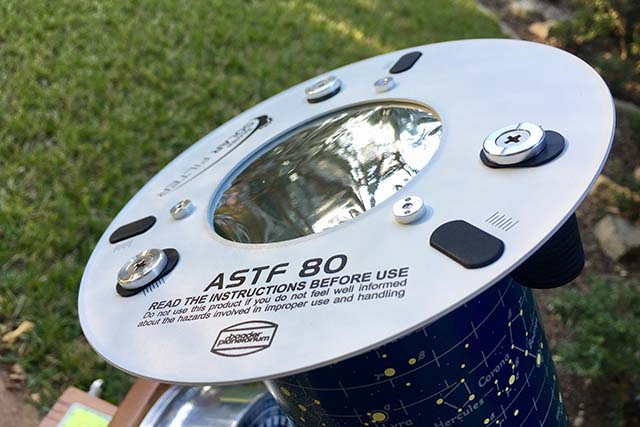
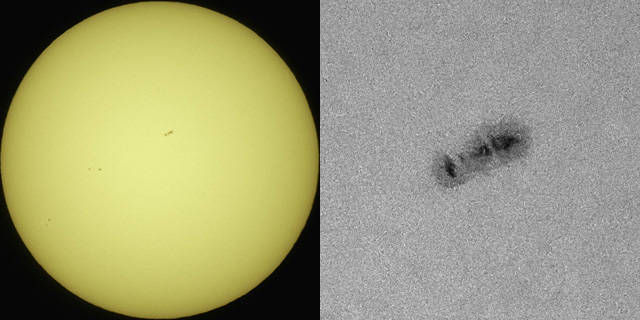
Baader Planetarium AstroSolar Film
The Baader Planetarium ASTF 80 filter provides 80 mm of clear aperture. Baader film is available with many different mountings. The Baader ASTF mounting is designed to avoid stress caused image distorting by avoiding stretching film as the mounting heats up.
I suspect that this image taken with just the Baader AstroSolar film was just bad luck and doesn't represent the full potential of the Baader film.

This is the best image of the batch and more representative of what can bee done with the Baader AstroSolar film. I had better luck when I added the UV/IR cut and #58A green. The step up in noise is probably due to placing the camera down in the sun while I added the cut and green filters to the image train.
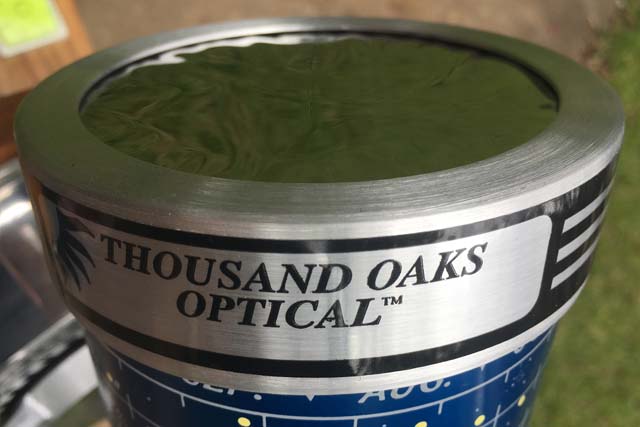
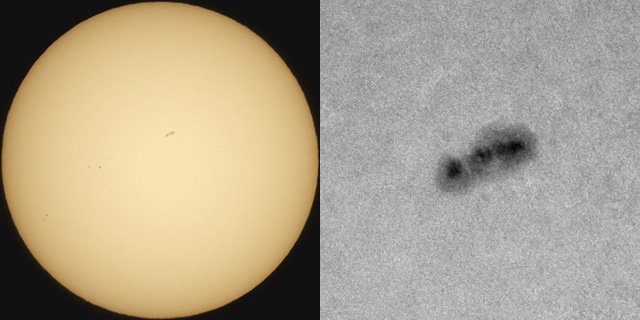
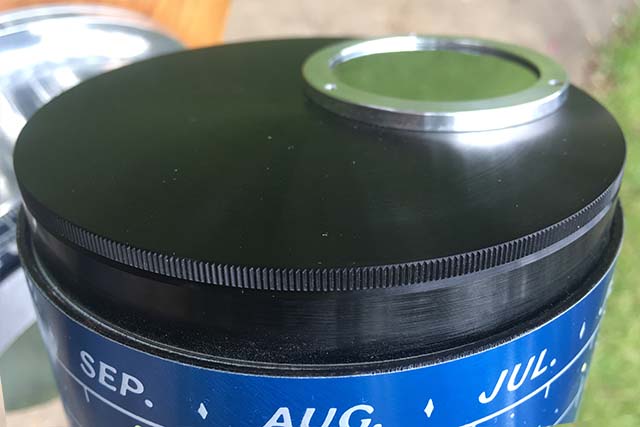
Thousand Oaks Optical Glass Type 2+
I used the 95mm threaded camera mount version of this filter which gives a full 89 mm of clear aperture. The threaded mounting makes a very secure attachment. I was surprised at the very good quality of the Thousand Oaks Glass Type 2+ filter images.
The yellow Glass 2+ filter may be providing some of the advantages of a narrower bandwidth in white light that the UV/IR #58A combination does. This was the best image taken with just a single white light filter.

The cut and green filters again produce a sharper image. There doesn't seem to be a problem using the green filter with the yellow solar filter. The camera has cooled down a bit in the shade of the telescope so the noise isn't as bad as in the Baader image with the extra filters.
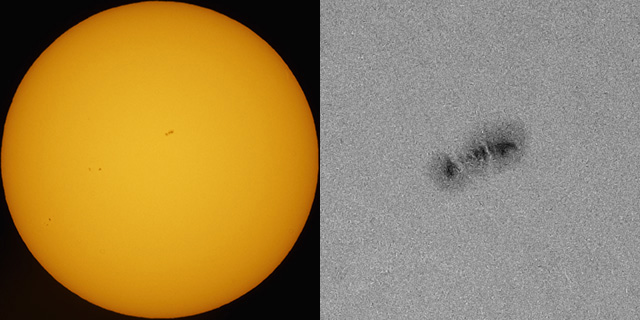
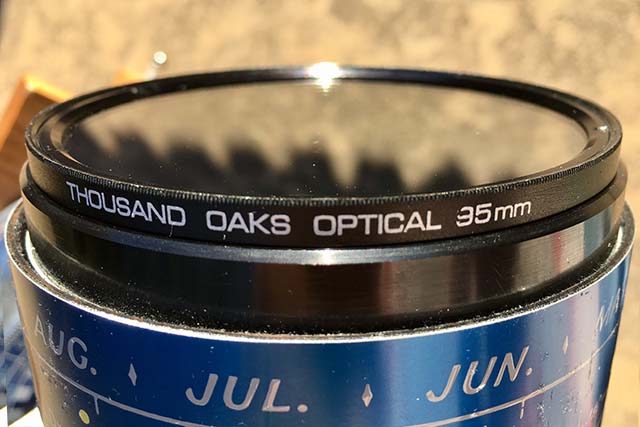
Thousand Oaks Optical RG-Film
This filter was made with the RG-Film formerly sold by Thousand Oaks and not the Solarlite film that they currently sell. The clear aperture of this filter is 86 mm in a slip fit mount that slides onto the Questar dew shield.
From other reports, I had expected the Thousand Oaks RG-Film to produce a better image than their Glass 2+ filter, but not on this day. This may be because of the less than ideal seeing conditions and the luck of the draw. Future tests will show if this holds up.
Once again the UV/IR #58A filter combination produces a better image. I think that you can also see the effects in image noise of the camera continuing to cool down. You would think that after 40 years, I'd have figured out that a black piece of metal heats up quickly in the Texas sun!
Questar glass sub-aperture filter
This is the standard 40 mm sub-aperture solar filter included with Questar 3.5" telescopes. The 95 mm threaded mounting makes a very secure attachment to the telescope. Adequate for casual observing, resolution is lower than the full aperture filters above. No images were taken with additional filters.
P.S. I've redone this comparison with new image data and the addition of a Questar full aperture filter.
Content created: 2016-12-01

Comments
![]() Submit comments or questions about this page.
Submit comments or questions about this page.
By submitting a comment, you agree that: it may be included here in whole or part, attributed to you, and its content is subject to the site wide Creative Commons licensing.


Made with care using XML on a Mac in Austin, Texas on
2026-07-14
© 2026 Robert C. Pettengill,
Ph.D. 