Framing and tracking a lunar eclipse
A total lunar eclipse is an opportunity for an astrophotographer to tell a story. The story can as simple as “the Moon turned red last night” or something more engaging or educational. When planning to photograph an eclipse, I find that knowing the story I want to tell ahead of time can make choices of equipment, shots, and exposure settings clear.
Tell an eclipse story
An image with a narrative is more engaging. As an amateur scientist, I find stories grounded in the physical reality of an event to be fascinating and educational. The challenge of revealing nature while transcending the limitations of equipment and circumstance is a great creative outlet.
You may find your inspiration in myth or imagination. I find these images to be compelling as well. Don't leave your viewer in doubt when you create a composite fantasy. Beautiful time-lapse images of an October eclipse, moving sideways along the horizon above a field of bluebonnets, can make a lovely composition. Expecting to see that in real life is heading for disappointment.
The suggestions below are frames of reference grounded in the physical motions of the eclipse. I hope they inspire your own ideas for capturing the reality of the eclipse experience.
Actors and events
A lunar eclipse has several main actors:
- The Sun, a behind the scenes source of light
- The Earth, obscures and filters the light of the sun
- The Earth’s shadow, the cone of darkness, filtered and scattered sunlight that reaches out to the Moon
- The Moon, travels through the Earth’s shadow to reveal Earth's effect on sunlight
- The photographer’s environment, including foreground architectural, landscape, and transient features

The image below shows the key events in the interaction between the Moon and the Earth’s shadow. Astronomers often use a terminology for eclipses or transits of two bodies based on when the edges of each appear to touch or make contact as one passes by the other. These contact points are numbered 1 through 4 in time sequence. The Moon's shadow has two distinct concentric parts: the umbra or total shadow and the penumbra or partial shadow. Each of these has four possible contact times with an edge of the Moon. In time order these are designated: P1, P2, U1, U2, U3, U4, P3, and P4. The Moon moves in an eastwardly direction through the Earth’s shadow.

You can capture these key events in the unfolding eclipse, including:
- The moody, dimly lit, full Moon in partial shadow (penumbra) P1 to P2 and P3 to P4
- The odd crescent of the Moon that we see when the dark umbra partially covers the Moon, just after U1 or before U4.
- The dramatic appearance or disappearance of the crescent of sunlight on the Moon right before or after totality, right before U2 or after U3.
- The deep orange and red colors of totality, between U2 and U3.
- The maximum total eclipse, midway between U2 and U3.
Frames of view
Seen from the earth there are three sources of motion in the eclipse.
- The motion of the Earth revolving around its own axis is the fastest motion. 360/deg in 24 hours is about 15 degrees / hour
- The motion of the Moon in orbit around the Earth. 360/deg in one lunar month is about 0.55 deg / hour
- The motion of the Earth and it’s shadow against the stars due to the Earth’s orbit around the Sun. 360 deg in 1 year which is just 0.04 deg / hour
These motions define natural frames of view for the eclipse, that emphasize different aspects of the event in our photography. Each view frame requires a different camera mount tracking and focal length lens.
The Earth is about 4 times the diameter of the Moon. The Earth's umbra gets smaller with distance because the Sun's rays are not parallel due to it's size and its light is diffracted by the edge of the Earth. The Earth's umbra is only about 2.7 times the size of the size Moon at the Moon's distance.
The figure below summarizes three natural frames of view based on these motions. Notice the difference which side of the Moon is illuminated between the fixed tripod (earth horizon) frame of view and the Earth's shadow frame of view. The rotation of the earth causes the Moon's natural west to east motion to reverse to east to west.

There are many possible ways to capture a lunar eclipse as a composite or video. These three frames of view are powerful because they give insight into the nature of the eclipse by being based on the physical motions of the actors in this drama.
- The fixed mount captures the human experience of the eclipsed Moon moving across the sky.
- Tracking at the speed of the Sun let's us visualize the Earth's shadow in space as the Moon moves through it.
- Tracking the Moon gives us close up views of the earth's shadow with it's bands of color moving across the lunar surface.
Arrangements of eclipse images into grids and circles or otherwise altering the motion of the Moon have their uses, but it is at the price of leaving out part of the physical story of the eclipse.
Fixed tripod mount
A camera on a fixed mount gives a frame of view dominated by the apparent motion caused by the Earth’s rotation. The Moon sweeps across a large part of the sky during the typical 3 and a half hour umbral (U1 to U4) eclipse. Capturing this requires a wide angle (short focal length lens).
 |
|
Super Blue Blood Moon Time-lapse Lometa Texas |
Tracking with a motorized mount
If our camera is on a tracking mount, we can cancel out the Earth’s rotation or the Moon's revolution and create frames of view that emphasize different aspects of the eclipse.
Tracking the Moon
If the camera tracks the Moon’s motion, then we can see in detail the progression of the Earth’s shadow across the face of the Moon. Because the face of the Moon is only 1/2 degree in size, we can use a very long focal length lens or telescope and show the Moon in great detail.
The stacked image below of the penumbral lunar eclipse of Feburary 11, 2017 was taken with a 1350mm Questar telescope tracking the Moon through a tree.

Tracking the sun/stars
If we track the motion of the Earth’s shadow, this is the same speed as tracking the Sun, the source of this shadow, in the sky. Not all tracking mounts have a setting for this. However, the motion of the Earth’s shadow against the stars is very slow and using a sidereal (360 deg in 23 hrs 56 min) is very close to the correct speed. This frame of view holds the Earth’s shadow fixed in the frame and allows the Moon to move through the shadow during the eclipse. This will move the Moon images in your frames closer by about Because the Earth’s umbra is about 2.6 times the size of the Moon, the required field of view is about 2 degrees and an intermediate focal length can be used.
If your mount tracked at a siderial rate rather than a solar rate your images in the final composite will be 7.3% too far apart along the direction of motion. You can adjust the image layer placements for this if you wish to visualize the shape Earth's shadow exactly.
Here's a time lapse video example from the Earth's shadow POV:
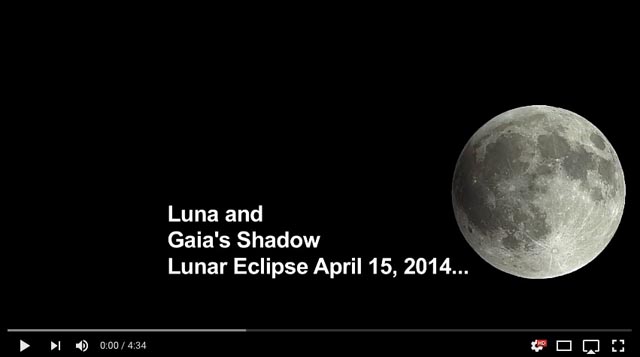
Some of the same data rendered as a time lapse composite:
 |
|
Luna & Gaia's Shadow |
Summarizing frames of view
| Time lapse motion views of the eclipse | |||
|---|---|---|---|
| frame of view | Mount tracking | Lens focal length | Field of View |
| Sweep of the eclipse across the sky | Fixed | Short | 45 deg + |
| Motion of earth’s shadow across the face of the Moon | Moon | Long | 1 deg + |
| Motion of the Moon through the Earth’s shadow | Sun/Stars | Medium | 3 deg + |
Foregrounds
Foreground landscape and architectural elements can add context and local flavor to your story. Opportunities for these increase when you are using a shorter focal length and the Moon is closer to the horizon during the eclipse. When totality is high in the sky, near the zenith, you can still include high elements such as buildings, trees, or mountains by carefully planning your location. See these for examples of the planning process for an eclipse near the horizon and how focal length affects the appearance of the Moon when shot with foreground elements.
Framing the action with landscape or cityscape features
For a time lapse image you need to frame your image to capture the whole story. You can use a planetarium program like Sky Safari to get the beginning and ending coordinates of the Moon in your image and calculate the angular field of view required. Add space for any foreground elements and a reasonable border. A program that allows you to define a reticle that corresponds to the field of view of your camera and lens/telescope is very handy. Here is the framing plan I created for the Super Blue Blood Moon Time-lapse shown above:

Learn more about how I prepared this framing plan and calculated the focal length. I used the planetarium program to visualize different camera and lens combinations and learn the field of view required for this January 31, 2018 lunar eclipse. A similar plan for the January 20, 2019 eclipse from Austin, Texas is shown below:

Screenshots from SkySafari were composited and edited for these visual framing plans. Once you have a visualization of where the Moon will be in your frame and how high it will be above the horizon, you can look for landscape elements to incorporate into your shot. Your exposures will be set for the Moon and may not capture your foreground well. Take some frames exposed for the foreground for your final composite. If you use one of the tracking frames of view you will need to pick the point in time that you want to show the foreground or it will be blurred in your final image.
Content created: 2019-05-14

Comments
![]() Submit comments or questions about this page.
Submit comments or questions about this page.
By submitting a comment, you agree that: it may be included here in whole or part, attributed to you, and its content is subject to the site wide Creative Commons licensing.

How to
Astro RaspberryPi Camera and kin, the ASIAir and StellarMate
Blind Smart-phone Equatorial Wedge or GEM Polar Alignment
Celestron FirstScope with equatorial tripod mount
Day-lapse Images of Earthshine on the Crescent Moon
DSO Astrophotography without a Telescope
DSO imaging without a star tracker
Overview & equipment for lunar eclipse photography
Framing and tracking a lunar eclipse
Moon photography - a dozen ways to shoot the Moon
Meteor shower photography & planning
Matching image sensor size to telescope resolution
Narrow band imaging with color cameras
Print and Display Astrophotography

Made with care using XML on a Mac in Austin, Texas on
2026-07-14
© 2026 Robert C. Pettengill,
Ph.D. 